Installing Database Plugin
Introduction
During the table structure design phase, if you want to select existing database tables, you need to ensure that the Database plugin is installed and configured in IntelliJ IDEA. Specifically, for the commercial version of IntelliJ IDEA, since it comes with the Database plugin integrated in the sidebar of the tool (the position may vary depending on the version), you just need to open the plugin directly and fill in the corresponding database connection information. For the community edition, this plugin is not included by default, users need to manually install the Database Navigator plugin through the plugin center, and then perform database connection configuration operations. In this way, regardless of the version, as long as the Database plugin is correctly configured and connected to the corresponding database, you can select existing database tables from it.
Commercial Version Plugin
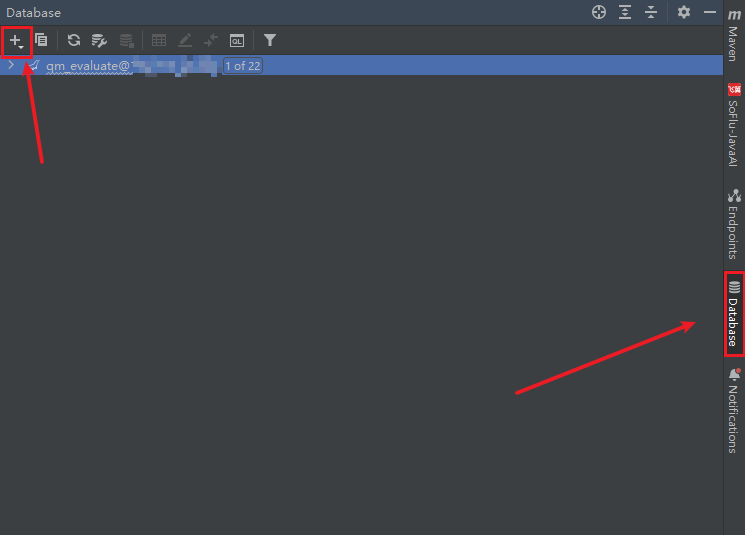
- The commercial version comes with a plugin. If not, it can be installed in the plugin center, similar to the community edition operation. Click the + button and select the corresponding database type.
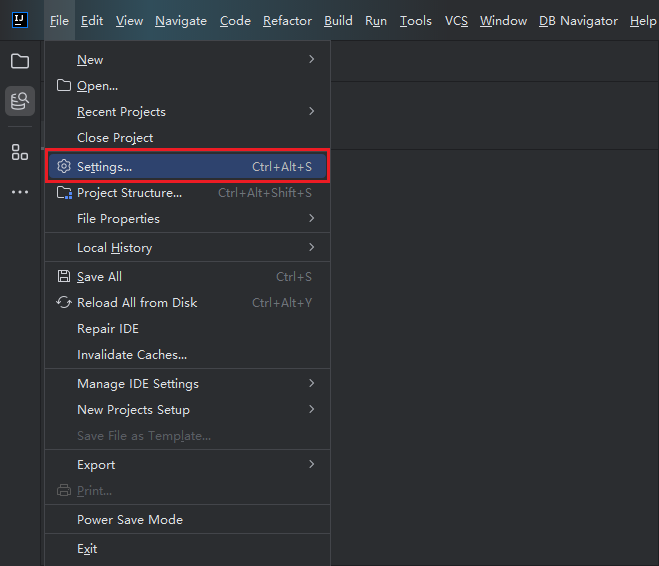
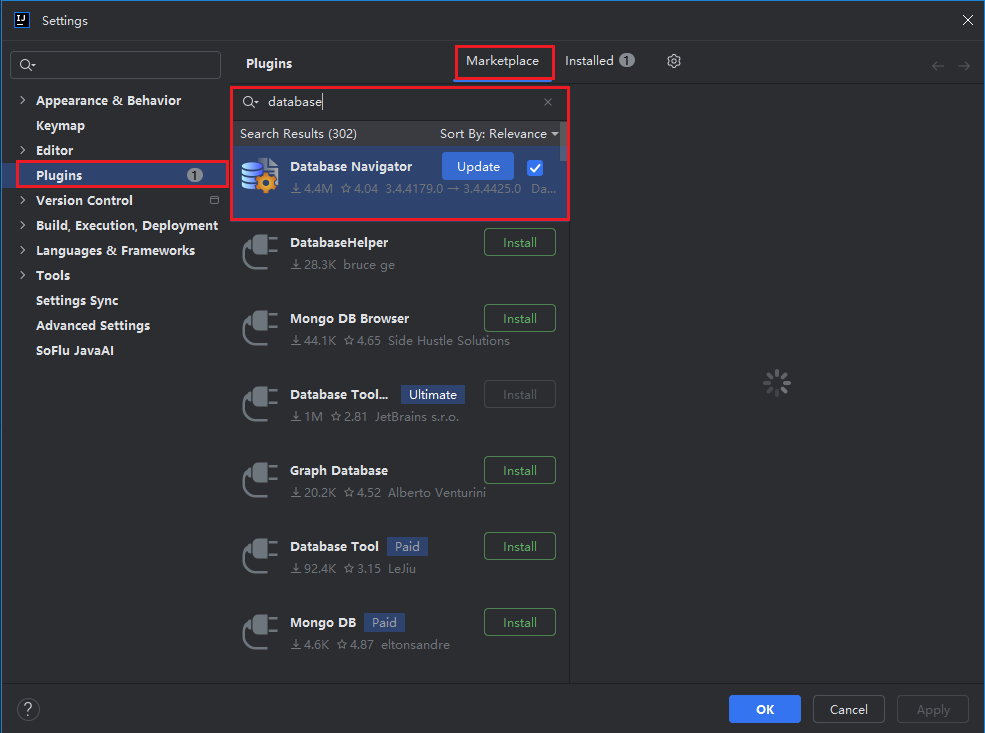
Community Edition Plugin Installation
- In the upper left corner, select "File > Settings > Plugins > Marketplace", then search for database, select Database Navigator, and install.